SIMBA Advanced Image Viewer Operation
New for 20201 Advanced Viewer update
The recent advanced SIMBA Image Viewer facilitates the interactive
inspection and annotation of images in the SIMBA system. This viewer
replaces the VisionX java applet viewer that is no longer supported
by most web browsers. It is faster and uses more advanced features
than the javascript SIMBA Standard Viewer; however, it does not
have all the annotation capabilities of the standard
viewer. In general, one or, in the case of image comparisons, two
viewports are initiated when the viewer is used by SIMBA, additional
viewports may be opened by the user. There is also a Dark button
that toggles a dark viewing presentation and a Fill button that
makes optimal use of the available screen space of image display.
The SIMBA image viewer allows 1 - 4 independent viewports
to be displayed.
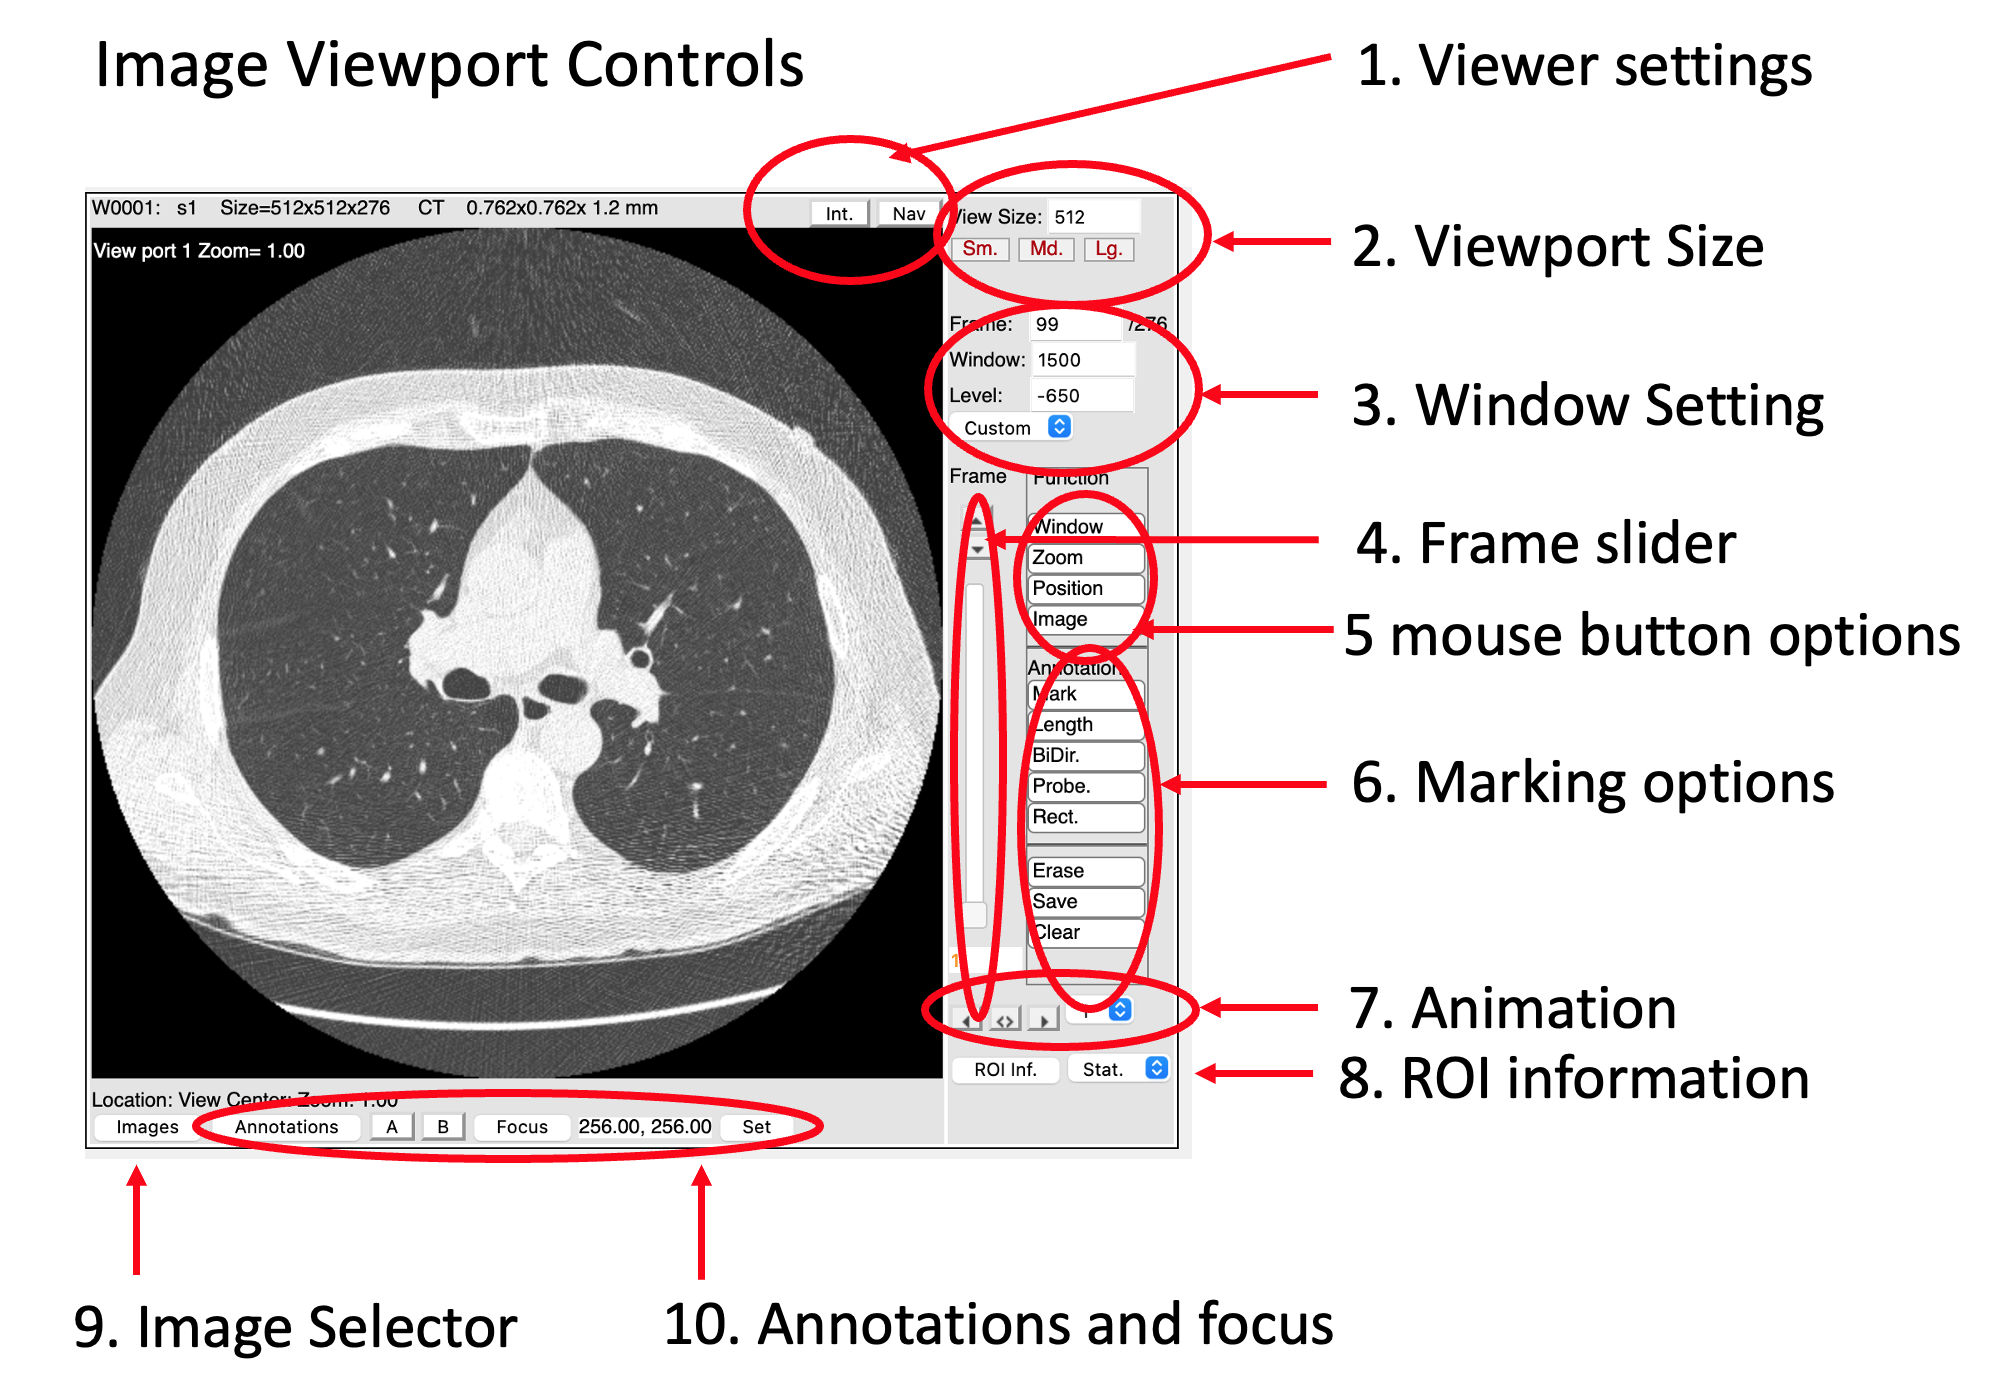
The control groups for a viewport are shown below:
The control groups for a viewport are shown below:
Mouse Functions
The viewer supports a 3-button mouse as shown. The left mouse button can be assigned different functions, such as image annotation, by selecting the appropriate function from the tools menu, illustrated below. Once use for an assigned left-button mouse function is completed the user should select the window function which is the default function. The tools menu includes all the three button mouse functions; therefore, a user with a single button mouse has full functionality.

In detail, the control group functions are as follows:
|
1. Viewer Settings
| When Int is selected then zero-order pixel interpolation is used and when the image is zoomed in the outline of each pixel can be seen. The default setting is bilinear pixel interpolation |
|
2. Viewport size:
| The size of the image window (largest dimension) in the viewport is displayed. The image size may be changed by entering a different number in the box or by using one of the presets: Sm. = 400, Md. = 512 (default) and Lg. = 800 pixels. |
|
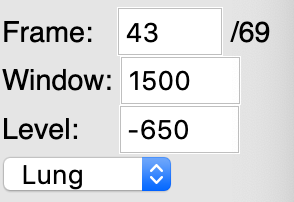
3. Window settings:
| The current image frame being displayed is shown. The frame may be changed by editing this number. Similarly, explicit values for the window and intercept may be set. Below the Level setting is a selector for a several standard preset window and level settings. |
|
4. Frame Slider:
| This slider permits the image frame to be rapidly changed (slider) or to be incremented/decremented (top buttons) to a different value. Speed will be faster if the image has been viewed recently and is cached in the bowser memory. |
|
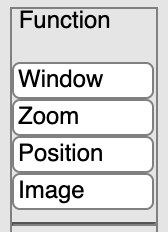
5. Mouse Functions:
| New for 2021: The first button "Window" set the left mouse button (when in the image window) to the window an level functions when dragging. This is the default left mouse button action. Window zoom is assigned to the right mouse button and window position is assigned to the middle mouse button. Window scrolling is used to change the current. If on a system with a single mouse button or track pad, the other mouse control actions can be assigned to this single button by selecting a function from given menu. Click on the window button to restore the default window function setting. |
|
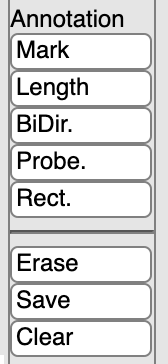
6. Marking:
| The menu items in the Annotation section assign a marking annotation tool to the mouse button as described in the annotation control panel. |
|
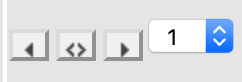
7. Animation:
| he right and left animation buttons start the images frame sequence in ascending or descending order respectively. The central button stops animation. The selector sets the speed of the animation with 1 being the slowest and 6 being the fastest. |
|
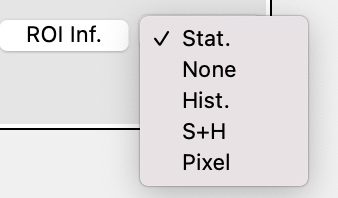
8. ROI Information:
| This option provides information on an image Region of Interest (ROI). First a rectangular region of the image must be selected by using the Rectangle (Rect.) marking tool as described in the annotation control panel. Then the desired information function must be selected with the right selector as one of "Stat.", "Hist.", "S+H", or "Pixel". Stat.will give some descriptive statistics of the selected ROI, Hist. will plot the histogram and S+H will report both. Note, these function are not yet implemented for color images. The pixel option will print the pixel values for the matrix of values specified by the ROI; this option is implemented for all pixel types including color images. Finally to collect and display the data click on the "ROI Inf." button. Note, you can refine the location and size of the ROI with the Rect. tool and just click the ROI Inf. button for the new ROI. |
|
9. Image Selector:
| This button causes a pop-up window to display all available images for that case and permits them to be loaded. |
|
10. Annotations:
and Focus:
|
This first button toggles the display of the current bookmark
location If there is one. The second button toggles the display of
the boundaries if there are any.
The Focus button displays the current focus location for zooming. The focus location coordinates are displayed next. Finally, the Set button will set the focus to the most recent mouse clicked location. |